You can configure the knowledge bank for your system using the options in the Knowledge Bank group in the System Administration window.
Options include:
| Knowledge Bank Settings | to enable the Knowledge Bank for your system, define review, audit, notification, clone, and object control settings for knowledge entries |
| Knowledge Base Types | to rename and display the base knowledge types used to define the nature of the knowledge entry in vFire Core |
| Knowledge Entry Types | to define your own knowledge entry types in vFire Core, as sub-tiers of the base types defined in Knowledge Base Types |
| Knowledge Profiles | to create and update knowledge profiles, a way of categorizing knowledge entries that is more detailed than the knowledge types |
| Knowledge Ratings | to define and create knowledge entry ratings and scores |
| Knowledge Statuses | to define statuses that can be associated with knowledge entries, such as Draft or Reviewed |
Knowledge Bank Settings
You can configure settings for how users, analysts, and contributors use the Knowledge Bank. The settings you can define include enabling the Knowledge Bank for your system, defining review settings for knowledge entries and defining setting for knowledge entries cloned from calls.
You can also set up text retrieval to index external documents within your Knowledge Bank, so they will display when running a Knowledge Bank Search.
Before you start
You must have Knowledge Bank Set Up enabled within your General Access Security Role to configure the knowledge bank.
-
Select the Menu button
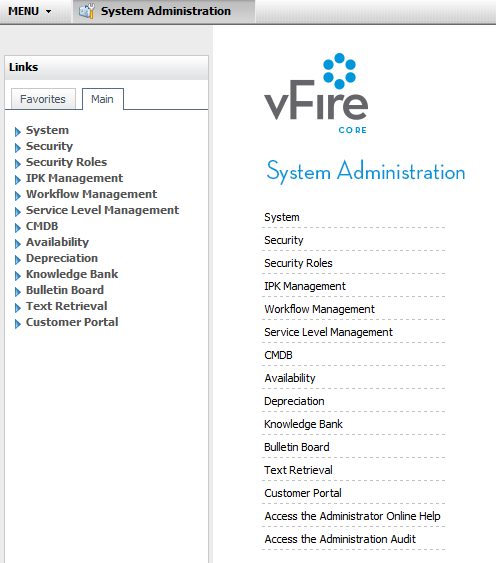
 , then Admin, and then select System Administration. The System Administration window is displayed, with a menu of options available
  . In the Explorer pane, expand the Knowledge Bank group of options
  if necessary. You may need to scroll down to see it.
 - Select Knowledge Bank Settings to display the Knowledge Bank Settings window
 .
. - Configure the settings as follows:


| Enabled | Enables the Knowledge Bank functionality in your system, and enables the settings on this window. You must have this option selected in order to configure the settings on this window, otherwise they are grayed out and uneditable. |
| Moderation Enabled | Enables moderation of knowledge entries for your system. If this option is selected, only knowledge entries with a moderated status are returned by the Knowledge Search. Unmoderated knowledge entries can be returned using the Knowledge Admin Search. |
| Email Notifications for Configured Status Changes | Enables email messages to be sent to authors or contributors of a knowledge entry, as well as all Analysts with permission to edit it in their Knowledge Management Security Role, when the status for an entry is updated. Enabling this will display the Email Editors and Email Contributors columns on the Knowledge Statuses window. |
| Store Historical Snapshots | Enables all versions of a knowledge entry to be stored on your system and displayed on the Knowledge History window. |
|
Knowledge Object Version Control |
Select this option to enable version control for objects attached to knowledge entries. Select to enable the Object Cancel option in the Options tab within the Knowledge Management Security Role |
| Default Review Period | Select the frequency at which a knowledge entry is to be reviewed from the drop down list. The time starts from the date an entry is created. |
| Status | Select the status that is automatically applied to a knowledge entry when the review period is reached as configured in Default Review Period. Statuses are defined in Knowledge Statuses. |
| Email Contributors | Enable to automatically send an email to the author and contributors when a knowledge entry is flagged for review. The Author is the creator of the knowledge entry. Contributors are analysts who made a significant change to the knowledge entry (that is, the Minor Updates option was unselected on Save). |
| Email Editors | Enable to automatically send an email to all Editors when the entry is flagged for review. Editors have Edit enabled in their Knowledge Management Security Role |
| Status | Select the default status to be assigned to knowledge entries that are cloned from calls. Select (Default), to assign the default knowledge status to the cloned entry, as defined in Knowledge Statuses. |
| Flag as Requiring Review | Enable to automatically select the Review Required option on the Save window of knowledge entries cloned from calls. |
| Audit Knowledge | Enable the tracking of changes made to knowledge entries, including the date of the change and the Analyst who made the change. Select to enable the Audit option in the Explorer Menu on the knowledge entry’s details window. To enable tracking of changes made to individual fields, auditing for each field must be enabled in Designer on the Knowledge Details screens. |
- Select
 to save the changes. Provide the Change Reasons if prompted to do so.
Knowledge Base Types
You can use knowledge base types to define the nature of the knowledge entry in vFire Core.
Before you start
You must have Knowledge Bank Set Up enabled within your General Access Security Role to work with knowledge base types.
The following knowledge types are available as standard in vFire Core:
| Abstract | a loose structure with a title and a body. This is useful for general information, detailed technical articles, and more complex walk-through or troubleshooting guides |
| Call | a knowledge entry that has been created directly from a call record. Call entries are used to record knowledge obtained from an incident, problem or known error. This knowledge type can be particularly useful as sensitive information such as client names and passwords can be stripped out and the content made available to a broader audience than would be available if the information was left in the incident, problem, or known error. |
| FAQ | a question/answer “frequently asked question” format. An FAQ entry represents a single question |
| KCS | an entry in which the problem, environment, cause and solution are written in separate sections. This follows the Knowledge-Centered Support (KCS) principles jointly developed by the Help Desk Institute (HDI) and the Consortium for Service Innovation (CSI) |
| Known Issue | an entry structured around an issue description and a corresponding workaround. Known issue entries are recorded for incidents which commonly recur and for which there is a known workaround. This is appropriate for ITIL problem management as they are extremely valuable in resolving incidents quickly. |
| Directory Entries | the path to a directory that contains documents to be indexed into the vFire Core Knowledge Bank. Plain text, MS Word and PDF documents are compatible with the vFire Core indexing service |
| External Website | the path to an external website to be indexed into the vFire Core Knowledge Bank. The contents of the websites can then be searched using Knowledge Search. |
You can rename these base types, or use them to define your own knowledge entry types.
You cannot add or delete these base types.
Renaming a Knowledge Base Type
- Select the Menu button , then Admin, and then select System Administration. The System Administration window is displayed, with a menu of options available . In the Explorer pane, expand the Knowledge Bank group of options if necessary. You may need to scroll down to see it.
- Select Knowledge Base Types to display the Knowledge Base Types window
 . (You may like to adjust the column widths to see all of the columns.)
 - Select the base type you want to rename in the browse table.
- Overwrite with the name you want to use.
- Select to save the changes. Provide the Change Reasons if prompted to do so.

Setting the Visibility of a Knowledge Base Type
You can set each knowledge base type to be hidden or visible throughout the system, such as when adding knowledge entry types, creating a new knowledge entry, and also on the search criteria panel in a knowledge search. All base types are set to visible by default.
- Select the Menu button , then Admin, and then select System Administration. The System Administration window is displayed, with a menu of options available . In the Explorer pane, expand the Knowledge Bank group of options if necessary. You may need to scroll down to see it.
- Select Knowledge Base Types to display the Knowledge Base Types window.
- Select or clear the Visible checkbox for the base type(s) you want to hide/display
 . (You may like to adjust the column widths to see all of the columns.)
 - Select to save the changes. Provide the Change Reasons if prompted to do so.

Knowledge Entry Types
You can define your own knowledge entry types in vFire Core, using the knowledge base types as a source. For example, you can create an entry type of “Technical Support Abstracts” and map it to the base type of “Abstract”. The entry type will be available when Analysts create a knowledge entry as a sub-tier of the base type.
Before you start
You must have Knowledge Bank Set Up enabled within your General Access Security Role to work with knowledge entry types.
Creating Knowledge Entry Types
- Select the Menu button , then Admin, and then select System Administration. The System Administration window is displayed, with a menu of options available . In the Explorer pane, expand the Knowledge Bank group of options if necessary. You may need to scroll down to see it.
- Select Knowledge Entry Types. The Knowledge Entry Types window is displayed, with a list of existing entry types displayed. This will be empty when you first configure the system.

- Select
 .
. - Type the name of the knowledge entry type in the Name column.
- Select the type you want to base it on from the drop down list in the Type column. (You may like to adjust the column widths to see all of the columns.)
- Repeat for each knowledge entry type you want to create.
- Select to save the changes. Provide the Change Reasons if prompted to do so.

Renaming a Knowledge Entry Type
- Select the Menu button , then Admin, and then select System Administration. The System Administration window is displayed, with a menu of options available . In the Explorer pane, expand the Knowledge Bank group of options if necessary. You may need to scroll down to see it.
- Select Knowledge Entry Types.
- Select the knowledge entry type you want to rename.
- Overwrite with the name you want to use.
- Select to save the changes. Provide the Change Reasons if prompted to do so.
Deleting a Knowledge Entry Type
You cannot reverse this procedure. If you delete a Knowledge Entry Type by mistake, you cannot restore it and will need to create a new Entry Type. Knowledge entries created under deleted Entry Types remain linked to that deleted value until an active value is selected in the Knowledge Entry's Detail window.
You can create a new Knowledge Entry Type with the same name as a deleted one. However, this may cause the appearance of duplicated data in reports if knowledge entries in your system are linked to both the deleted value and active value.
- Select the Menu button , then Admin, and then select System Administration. The System Administration window is displayed, with a menu of options available . In the Explorer pane, expand the Knowledge Bank group of options if necessary. You may need to scroll down to see it.
- Select Knowledge Entry Types.
- Select the knowledge entry type you want to delete.
- Select Delete. The entry disappears from the browse table but it is not yet deleted.
- Select to save the changes. Provide the Change Reasons if prompted to do so.
Knowledge Profiles
Knowledge Profiles are a way of categorizing knowledge entries that is more detailed than the knowledge base types. Profiles should be used to describe the topic or category of knowledge, rather than its format, and you can define up to three tiers for each profile. For example, you might want to create profiles such as Network, Printers, and Peripherals for an IT organization, or profiles for different types of process such as Release Management or Service Quality and Improvement. These can apply to any part of the Knowledge Bank, whatever type or sub-type it is.
Before you start
You must have Knowledge Bank Set Up enabled within your General Access Security Role to work with knowledge profiles.
Creating a Knowledge Profile
- Select the Menu button , then Admin, and then select System Administration. The System Administration window is displayed, with a menu of options available . In the Explorer pane, expand the Knowledge Bank group of options if necessary. You may need to scroll down to see it.
- Select Knowledge Profiles. The Knowledge Profiles window is displayed, with three panes – Tier 1, Tier 2 and Tier 3
 .
. - Select
 beneath the Tier 1 pane. A blank row is added to the list.
 - Type the profile name into the row, for example, Hardware.
- To define the profile as the default, select the checkbox in the Default column
 . There can only be one default.
 - To define lower tiers for this profile, select the profile in the first tier and then select beneath the Tier 2 pane.
- Key in the name you wish to appear on the second tier for the selected profile. You can add several entries into the Tier 2 pane for the same profile, for example, Configuration or Installation.
- To define Tier 3, select the profile in Tier 1 and the entry in Tier 2, if there is more than one. Then select beneath the Tier 3 pane.
- Key in the name you wish to appear on the third tier. Again, you can add several entries, for example, for Configuration in Tier 2 you could add File Server, PC, Laptop, Printer and so on in Tier 3.

- Select to save the changes. Provide the Change Reasons if prompted to do so.


Renaming a Knowledge Profile
- Select the Menu button , then Admin, and then select System Administration. The System Administration window is displayed, with a menu of options available . In the Explorer pane, expand the Knowledge Bank group of options if necessary. You may need to scroll down to see it.
- Select Knowledge Profiles. The Knowledge Profiles window is displayed, with three panes – Tier 1, Tier 2 and Tier 3.
- Select the profile you want to rename. If you want to rename an entry held in Tier 3, select the Tier 2 entry to which it is linked to display it.
- Overwrite with the name you want to assign.
- Select to save the changes. Provide the Change Reasons if prompted to do so.
Deleting a Knowledge Profile
You can delete an entire profile, or the entries on the second or third tiers. If you delete an existing profile, any details already defined for that category by the Analyst will be retained however, they will not be able to define any new ones.
You cannot delete the default entry or the system created Unspecified.
You cannot reverse this procedure. If you delete a profile by mistake, you cannot restore it and have to re-create the entry and re-define entries within the lower tiers. Knowledge entries linked to deleted Knowledge Profiles remain linked to that deleted value until an active value is selected in the Knowledge Entry's Detail window.
- Select the Menu button , then Admin, and then select System Administration. The System Administration window is displayed, with a menu of options available . In the Explorer pane, expand the Knowledge Bank group of options if necessary. You may need to scroll down to see it.
- Select Knowledge Profiles. The Knowledge Profiles window is displayed, with three panes – Tier 1, Tier 2 and Tier 3.
- Select the profile you want to delete. If you want to delete information held in Tier 3, select the Tier 2 entry to which it is linked to display it.
- Select
 .
. - Select to save the changes. Provide the Change Reasons if prompted to do so.
Knowledge Ratings
You can define and create knowledge entry ratings and scores. These scores are displayed on all knowledge entries, and Analysts or Users who read a knowledge entry can assign a score to it. However, you can set an option whereby only editors can see a particular rating. The score is attributed to the author/contributor of the entry.
Before you start
You must have Knowledge Bank Set Up enabled within your General Access Security Role to work with knowledge ratings.
Setting Up a Knowledge Rating
- Select the Menu button , then Admin, and then select System Administration. The System Administration window is displayed, with a menu of options available . In the Explorer pane, expand the Knowledge Bank group of options if necessary. You may need to scroll down to see it.
- Select the Knowledge Ratings option to display the Knowledge Ratings window
 .
. - Select . A new row is added to the browse table with a default score of 3 in the Score field.
- Key the name for the new rating in the Rating field.
- From the Score field, select a score between 0 and 5 for your new rating.
- Select the Editor Only checkbox to make the ratings for the knowledge entries only available to editors.
- Repeat for each rating you want to create.
- Select to save the changes. Provide the Change Reasons if prompted to do so.

Updating a Knowledge Rating
You can change the score and description of knowledge ratings. Ratings in use will be updated to display the new details.
- Select the Menu button , then Admin, and then select System Administration. The System Administration window is displayed, with a menu of options available . In the Explorer pane, expand the Knowledge Bank group of options if necessary. You may need to scroll down to see it.
- Select the Knowledge Ratings option to display the Knowledge Ratings window.
- Select the rating you want to update.
- Make the necessary changes, selecting an alternative score from the drop-down list, overwriting the rating or selecting/deselecting the Editor Only option if you want to restrict the rating to people with editing privileges or make it available to everyone.
- Select to save the changes. Provide the Change Reasons if prompted to do so.
Deleting a Knowledge Rating
You can delete a knowledge rating if you feel it is redundant or misleading. The original rating remains on existing articles but when adding a new rating the deleted value won’t be available.
You cannot reverse this procedure. If you delete a Knowledge Rating by mistake, you cannot restore it and have to re-create it.
- Select the Menu button , then Admin, and then select System Administration. The System Administration window is displayed, with a menu of options available . In the Explorer pane, expand the Knowledge Bank group of options if necessary. You may need to scroll down to see it.
- Select the Knowledge Ratings option to display the Knowledge Ratings window, with a list of existing ratings.
- Select the rating you want to delete.
- Select
 .
. - Select to save the changes. Provide the Change Reasons if prompted to do so.
Knowledge Statuses
You can define statuses that can be associated with knowledge entries, such as Draft or Reviewed. A status is set for a knowledge entry when it is created.
Before you start
You must have Knowledge Bank Set Up enabled within your General Access Security Role to work with knowledge statuses.
Defining a Knowledge Status
- Select the Menu button , then Admin, and then select System Administration. The System Administration window is displayed, with a menu of options available . In the Explorer pane, expand the Knowledge Bank group of options if necessary. You may need to scroll down to see it.
- Select the Knowledge Statuses option. The existing statuses are displayed, along with the settings associated with them, although some of the options depend on settings set elsewhere, as described below
 . (You may like to adjust the column widths to see all of the columns.)
 - Select . A new row is added to the browse table.
- In the Status column, key in the name for the new status.
- Select the settings which you would like to apply to the status:

| Moderated | Enables knowledge entries with this status to be found via a knowledge search. Moderation Enabled must be selected in the Knowledge Bank Settings to display this option. |
| Publish to Self Service Portal | Enables knowledge entries with this status to be visible on the vFire Self Service portal. If Moderation Enabled is selected in the Knowledge Back Settings window, knowledge entries will only display on the vFire Self Service portal if the status assigned to the entry has both the Moderated and Publish to Self Service Portal options selected. |
| Email Contributors | Enables an email to be sent to the author and contributors when a knowledge entry is changed to this status. This column is only displayed if the Email Notifications For Configured Status Changes option is selected in the Knowledge Bank Settings. |
| Email Editors | Enables an email to be sent to all Analysts with the Edit option enabled in their Knowledge Management Security Role when the entry is changed to this status. This column is only displayed if the Email Notifications For Configured Status Changes option is selected in the Knowledge Bank Settings. |
| Default | Makes this the default status. When an analyst creates a knowledge entry and does not specify a status, this status will be applied. You can select only one status to be the default. |
- Repeat for each status you want to create.
- Select to save the changes. Provide the Change Reasons if prompted to do so.
Updating a Knowledge Status
You can update the details associated with a knowledge status. This will update wherever the status is currently used, as well as for new knowledge entries.
- Select the Menu button , then Admin, and then select System Administration. The System Administration window is displayed, with a menu of options available . In the Explorer pane, expand the Knowledge Bank group of options if necessary. You may need to scroll down to see it.
- Select the Knowledge Statuses option. The existing statuses are displayed, along with the settings associated with them.
- Select the Knowledge Status you want to update.
- Update the details, overwriting where necessary. (You may like to adjust the column widths to see all of the columns.)
- Select to save the changes. Provide the Change Reasons if prompted to do so.
Deleting a Knowledge Status
Existing articles will continue to show the status, but it will not be available when selecting a status.
You cannot delete the default status. This is supplied as Unspecified but may have been renamed.
You cannot reverse this procedure. If you deleted a Knowledge Status by mistake, you cannot restore it and have to re-create the entry by creating a new Knowledge Status.
- Select the Menu button , then Admin, and then select System Administration. The System Administration window is displayed, with a menu of options available . In the Explorer pane, expand the Knowledge Bank group of options if necessary. You may need to scroll down to see it.
- Select the Knowledge Statuses option. The existing statuses are displayed, along with the settings associated with them.
- Select the Knowledge Status you want to delete.
- Select .
- Select to save the changes. Provide the Change Reasons if prompted to do so.
If you have chosen the system defined status, you will receive an error message stating that you are attempting to delete a "static record", which cannot be deleted. Select OK to close the warning window.