Managing Locations
This topic is subject to expert review. Please provide any feedback to Alemba Support.
The location and address fields are displayed on the CMDB Item Details windows, the Person Details window and Organization Details window.
You can decide whether locations are to be linked to organizations. If they are, calls can only be linked to locations already linked to the organization that has been defined within the call. If locations are not linked to organizations, you can link a call to any location regardless of the organization defined within the call.
Creating a Location
Before you start
Ensure that Location New is selected in the Locations tab of your Configuration Management security role selected.
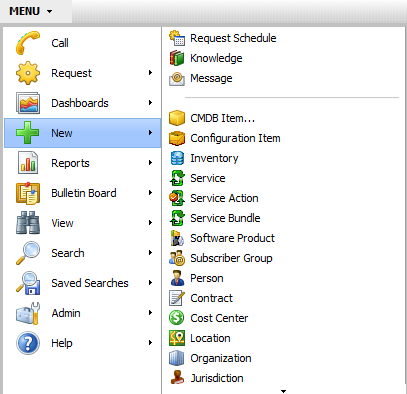
The Location option will be grayed out in the New menu if Locations Linked to Organizations is selected in the CMDB Settings because this means that a location can only be created when it is linked to an organization.
- Select
 and then New. From the submenu, select Location
  .
. - Select the arrow to the right of the Location field
 . (Note the prerequisites above.)
 - Complete the details.
- Select
 to save the changes and close the window, or
  to save the changes and redisplay the window as a blank form, enabling you to create another location. Complete the change reasons if prompted to do so.
 - The Locations Explorer pane offers further options for working with locations.

You can also create new locations from the Location Quick Search window displayed when you use the Q/D button on Call Details, CMDB Details and Request Details windows.
| Location | This is the name for the location. This field identifies the location of the organization. It is possible to have multiple locations for each organization. If your system has been set up to have one set of predefined locations available for all organizations, the site name is selected from this list. |
| Primary Location | To enable a location to be the primary location for an organization, select this option. The location will then be used by default whenever the linked organization is selected on a window (such as the Call Details or User Details window). |
| Address | There are 2 lines for which you can enter the street address for the location. Each line may have up to 40 characters on it. |
| Suburb | This field enables you to define the suburb for the Location. The suburb may also be used as the Location name. A maximum of 40 characters may be used. |
| State | This field enables you to define the State for the Location. |
| Postcode | This field enables you to define the postcode for the Location. A maximum of 15 characters may be used to record the postcode. |
| Country | This field enables you to define the country for the Location. This is useful if the system is supporting organizations with offices in a number of countries. A maximum of 40 characters may be used to record the country for the location. |
| Telephone | This field enables you to define the Telephone number for the Location. A maximum of nine characters may be used to record the telephone number. |
| Facsimile | This field enables you to define the Facsimile number for the Location. A maximum of 20 characters may be used to record the facsimile number. |
Locations Explorer Options
The following options are available in the explorer pane of the Location Details window. Access to some of these options will depend on the permissions selected in the Locations tab of your configuration management security role, and system settings.
| Select | To... |
| Service Items | view all of the services, service actions and service bundles linked to the location |
| Agreements | view all the agreements where the entity, person or contract is specified in the agreement selection criteria |
| Location Report | view the details of the location in a report format |
| Object | attach objects or files from Windows applications to the current location |
| Attributes | type data into categories set up in the Administration module |
| Forms | capture general, non-reportable, non-searchable information about the location |
| Audit | view an audit trail of the changes made to the details of the location |
| Stakeholders | link stakeholders to the current location |
Searching for a Location
Before you start
Ensure that you have Location View selected in the Locations tab of your Configuration Management security role.
- Select and then Search. From the submenu, select Locations.
- The Location Search window is displayed. It is divided into two panes; you can select the criteria for the search in the left frame, and the results are displayed in the right pane.
- Complete the necessary criteria. You can apply as many criteria as you wish, but you must specify at least one Location Criteria to run the search.
- Equal limits the search to only items created against this value, so if an Organization Head Office was selected, only items linked to Head Office will be displayed.
- Equal + Below includes items of the specified value and subsidiary items, so Head Office and all subsidiaries will be displayed.
- Equal + Above includes all items of the specified value and any parent values, so Head Office and the Organization it is part of will be displayed.
- To add more fields to your search criteria, configure your search criteria.
- Select
 . The results are displayed in a browse table located in the right hand pane.
 -
The number of records returned from this search depends on the value set by your administrator.
- From here, you can do any of the following:
- You can also create a new location using the
 button at the bottom of the Location Search Criteria pane.
| Active | Select this option to include location/s that have been created and are in use (that is, not deleted) |
| Deleted | Select this option to include location/s that have been created, and subsequently deleted on your system |
| Primary Location | Select this option to include location/s that are flagged as Primary Locations |
| Partition |
Select the partition to search for location/s created in the partitions to which you have access. This field is only displayed if partitioning is appropriate. |
| Include Deleted Field Values | Select this option to include deleted location/s to be displayed in the lists so that these values can be included in your search |
| Location | Select this option to search for a location by the name you specify. Type % to include all locations, or use the Q/D button to specify a location. |
| Country | Select this option to limit your search to a specific country. Type % to include all countries, or use the Q/D button to specify a country. |
| Organization | Select this option to search for a location which is linked to the Organization you specify. Type % to include all organizations, or use the Q/D button to specify an organization. |
| Equal, Equal + Below, Equal + Above | Select one of the radio buttons to include or exclude subsidiary items in Q/D searches: |

|
to view a selected location |

|
to refresh the window |

|
to delete a selected location |

|
to adjust the columns |

|
to print the results |
Updating a Location
Before you start
Location Update must be selected in the Locations tab of your Configuration Management security role.
-
 Display the Location Details window, if it is not already on screen.
Search for the location, select it from the browse table of results and then select
. - Update the details, as necessary.
- Select to save the changes and close the window, or to save the changes and redisplay the window as a blank form, enabling you to create another location. Complete the change reasons if prompted to do so.
- The Locations Explorer pane offers further options for working with locations.
Deleting a Location
Before you start
Location Delete must be selected in the Locations tab of your Configuration Management security role.
- Search for the location, if the details are not already on screen.
- From the browse table, select the location you want to delete, and then select .
- If you want to view the details first, select the location from the browse table and then select . When you are confident that this is the location you want to delete, select on the details window.