Call Priority
Each call is automatically assigned a priority when it is logged, based on Call Impact and Call Urgency. Priorities are used within the Priority Matrix. Escalation and agreement breach times can be calculated based on call priority (among other factors). By default, some sample priority names are already entered when your vFire Core system is installed. You can also define further priorities.
If your system is partitioned, you should create and define Call Impact, Call Urgency, Call Priority, and a Priority Matrix in each partition to ensure that calls logged via an incoming email account are allocated the correct Call Priority.
Creating Priorities
Before you start
As some parameters are read from the database at application start-up, we recommend that there are no Analysts logged on when you make changes to system settings.
Ensure you are in the correct partition before applying the settings.
You must have
-
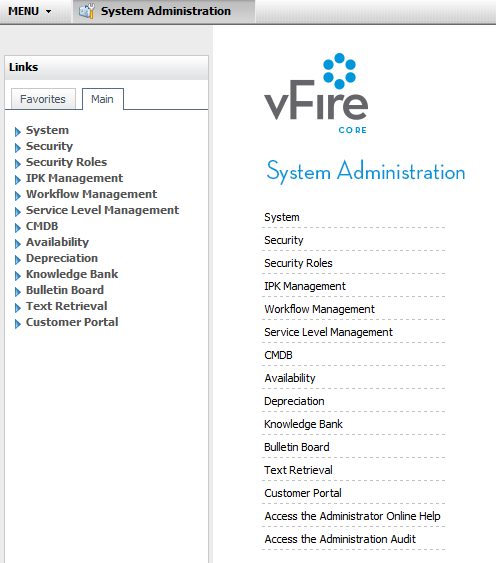
Select the Menu button
 , then Admin, and then select System Administration. The System Administration window is displayed, with a menu of options available
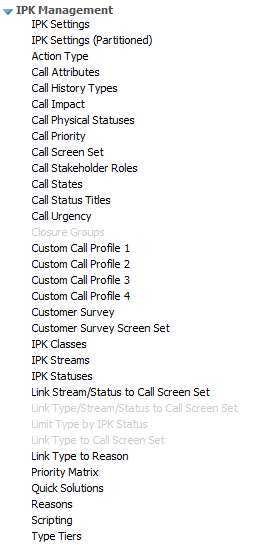
  . In the Explorer pane, locate the IPK Management group
  , scrolling up or down if necessary. You may need to expand the group to see the options.
 - Select Call Priority to open the window.
- Select
 . A row is inserted in the browse table.
 - In the Name column, type the name of the priority you want to create. The maximum name length is 17 characters.
- Select
 to save the changes. Provide the Change Reasons if prompted to do so.
Setting a Default
Before you start
As some parameters are read from the database at application start-up, we recommend that there are no Analysts logged on when you make changes to system settings.
Ensure you are in the correct partition before applying the settings.
You must have IPK Set Up selected in the Admin tab of your General Access Security Role to configure the IPK management settings.
If Impact-Urgency-Priority Derivation is selected in the IPK Settings window, default call priority will be derived from the Priority Matrix, overriding any default priority set here.
-
Select the Menu button
, then Admin, and then select System Administration. The System Administration window is displayed, with a menu of options available . In the Explorer pane, locate the IPK Management group , scrolling up or down if necessary. You may need to expand the group to see the options. - Select Call Priority to open the window.
- To assign one of the call priorities to be the default priority, select the checkbox in the Default field for the priority. (You may like to adjust the column widths to see all of the columns.) Any call that is logged will have the priority set to the default value if the Analyst does not select a priority. Only one call priority can be checked as the default.
- Select to save the changes. Provide the Change Reasons if prompted to do so.
Changing the Order of Priorities
Before you start
As some parameters are read from the database at application start-up, we recommend that there are no Analysts logged on when you make changes to system settings.
Ensure you are in the correct partition before applying the settings.
You must have IPK Set Up selected in the Admin tab of your General Access Security Role to configure the IPK management settings.
-
Select the Menu button
, then Admin, and then select System Administration. The System Administration window is displayed, with a menu of options available . In the Explorer pane, locate the IPK Management group , scrolling up or down if necessary. You may need to expand the group to see the options. - Select Call Priority to open the window.
- Select a priority by highlighting it.
- Select
 or
or  to change its order in the table. This is the order in which the priorities will be displayed on the Call Details window.
 - Select to save the changes. Provide the Change Reasons if prompted to do so.
Deleting a Priority
Before you start
As some parameters are read from the database at application start-up, we recommend that there are no Analysts logged on when you make changes to system settings.
Ensure you are in the correct partition before applying the settings.
You cannot restore a deleted priority.
You cannot delete the default priority.
You must have IPK Set Up selected in the Admin tab of your General Access Security Role to configure the IPK management settings.
If you delete a priority that is used in the priority matrix, it will still appear in the matrix appended with an asterisk (*).
-
Select the Menu button
, then Admin, and then select System Administration. The System Administration window is displayed, with a menu of options available . In the Explorer pane, locate the IPK Management group , scrolling up or down if necessary. You may need to expand the group to see the options. - Select Call Priority to open the window.
- Select the priority you want to delete by selecting in the relevant row.
- Select
 . If you attempt to delete the system default, you will receive a warning message.
 - Select to save the changes. Provide the Change Reasons if prompted to do so.